Tuesday, December 27, 2011

How To Cook Toston Sandwich

I am so proud he was the winner in the Comfort Foods episode of Ultimate Recipe Showdown, a new Food Network cooking competition where regular cooks, just like you and me, compete to see who has the Ultimate recipe in a series of categories.
And why I could be proud of Iván specifically? He’s Boricua (another word for Puerto Rican, derived from Borinquen, the original indigenous name of Puerto Rico) and he won with his Boricua Plantain Sandwich. It’s not vegetarian, but it did remind me of a sandwich my friend Tania taught me how to make a few years back. I was so surprised to see use TOSTONES as the “bread” for the sandwich, something I had only seen Tania do.
Tostones (which are also called patacones in South America) are twice fried mashed green plantains. Tostones are a staple in Puerto Rican cooking and for people trying to “get away from the carbs” are a great bread substitution in this sandwich. But less carbs does not mean less fat – I did tell you these are TWICE FRIED, no?
Let me give you the play by play to making my vegetarian version of the Tostón Sandwich.
Toston Sandwich
1 green plantain, peeled
2 small strips of firm tofu – you can definitely used extra firm here, but never the silken kind
1/4 onion, sliced
Garlic Salt
1/4 cup Tamari Sauce
Ketchup
Canola Oil for frying
1. Take the tofu pieces and press them in between 2-3 good paper towels or napkins (I use Bounty) to drain away most of the liquid. I place then in between 2 small baking sheets and weigh using something heavy. I change the paper towel at least once. meanwhile…
2. Peel the green plantain. Remember that green plantains, just like green bananas, have a sap (mancha). Remember to oil the knife you’re using to peel the plantain so the sap does not adhere to the knife. Follow the method I showed you for the green bananas here.
3. In a medium skillet, heat about 1 cup of canola oil over medium high heat. Just make sure the skillet is wide enough that will fit your plantain. If your plantain is on the small side, by all means, use a smaller skillet. You need enough oil to cover the plantains halfway, more or less.
4. Cut the plantain in half lengthwise, making two long halves.
5. Make sure the oil is hot enough. Rachael Ray taught me to dip the end of a wooden spoon into the oil. If the oil bubbles around the spoon, the oil is ready. I love this tip.
6. Fry the plantain halves for about 5 minutes. What you’re looking for is to cook the plantain, add some color to it, but without getting it crispy.
7. Take the partially fried plantain halves out of the oil and using either two heavy plates or two small baking sheets, smash them flat. If using baking sheet, place a kitchen towel on top so the heat does not transfer to your hand. Keep the oil in the hot stove, you will use it again. Sorry I don’t have a picture of this, but I was by myself making this and I could not smash and photograph at the same time. This is the already-smashed plantain…
8. After smashing the plantains, re-immerse the smashed plantain halves in the hot oil to finish frying.
 I have also made this with fried white cheese instead of the tamari-marinated tofu. It tastes delicious!!! If you fry the tostones in hot enough oil and drain them, they will be crunchy, but not oily.
I had not done this sandwich in a long time… so I thank Iván and the Ultimate Recipe Showdown for reminding me. And even it’s not vegetarian, you can taste an adaptation of Iván’s sandwich at your local TGIFriday’s restaurant. They’re made with sweet ripe plantains, which is a different “ball game”, but still you can come out and support my fellow Boricua!

Thursday, December 22, 2011

Perfect Pie Crust Recipe

My mom and I have a tradition that every Thanksgiving Eve, we bake pies together for the next day. How fortunate that just last month, I found a recipe for perfect pie crust while making a chicken pot pie. This dough was beautiful: pliant, easy to work with, and with all the best qualities of both butter (rich flavor) and shortening (flakiness and holding its shape). This makes 2 pie crusts.
Happy Thanksgiving!
Perfect Pie Crust
1/2 c. vegetable shortening
1/2 c. cold unsalted butter
3 c. all-purpose flour
1 tsp. kosher salt
1 c. ice water
Mix the shortening, butter and salt into the flour with a pastry blender until very crumbly. Add water until the dough comes together into a ball. Cover dough in plastic wrap and refrigerate at least 1 hour, or as long as 24 hours.
When ready to make pie, roll the dough out on a floured surface until it fits your pie pan. Fold in half, then in half again, and transfer to the pie pan. Now unfold it. Do the same with the top crust, tucking the extra dough under and crimping the edges. Bake as indicated in your pie recipe.

Monday, December 19, 2011

How To Cook Aunt Eliane’s Whole Potatoes Sautéed in Butter

A lot of Ecuadorian dishes have potatoes as a side dish, sometimes the potatoes are boiled, fried, mashed, in patties, you name it, one of my favorite potato sides is when the potatoes are roasted and cooked alongside a meat dish, however this can’t always be done, especially when you aren’t cooking a meat dish or the dish doesn’t allow the potatoes to be cooked with it. I like boiled potatoes, but I always feel like they’re missing something, even if they’re served with a sauce, so last summer we were visiting Nico’s aunt Eliane in Provence and she was making potatoes as a side for a wonderful meal she made (my mouth is watering), she boiled them first and then sautéed them with butter until they had a nice golden brown color, they were so good, so now whenever I have a dish that usually has plain boring boiled potatoes as a side I sauté the potatoes in butter until they are browned, leave it up to the French to turn something boring into something delicious. The way I see it this is a compromise, maybe not as healthy as plain boiled potatoes, but tasty enough without being completely fried (don’t get me started on homemade fried potatoes – I give into that weakness about every six months).
Ingredients:
10 Yukon gold potatoes, washed
Water for boiling potatoes
4 tbs butter
Salt to taste
Preparation:
Boil the potatoes until tender, let cool down and peel the potatoes
Heat the butter in a large sauté pan and add the potatoes, cook until well browned on all sides.
Sprinkle with salt and serve.

Thursday, December 15, 2011

Spring Vegetable Rolls Recipe


INGREDIENTS
FOR THE PANCAKES:
Flour 1 cup
Milk 2 cups
Soda-bi-carbonate A pinch
Oil 2 tsps.
Oil for shallow frying
Salt ½ tsp.
FOR THE STUFFING:
French beans 50 gms.
Carrots 50 gms.
Cabbage 100 gms.
Bean sprouts 100 gms.
Onions(finely chopped) 2 nos.
Capsicum(thinely sliced) 2 nos.
Soya sauce 1 tsp.
White pepper ½ tsp.
Sugar ½ tsp.
Ajinomoto ½ tsp.
Oil 3 tbsps.
Salt and pepper to taste
METHOD
For making the Pancakes:
1. Sift salt and flour. Add milk gradually, beating well
to make a smooth thin batter for the pancakes.
2. Add soda-bi-carbonate and mix well.
3. Heat a non stick pan. Pour a little batter on it and
tilt the pan so that batter spreads evenly.
4. Remove when the under side is cooked. Do not cook
the other side.
5. Make the remaining pancake in the same way and keep
it in a napkin one on top of the other.
To Prepare The Filling:
1. Cut the vegetables(except beansprouts) into thin long stripes.
2. Heat the oil in a kadhai. Add onions, sprouts
and vegetables and stir fry for 5 minutes.
3. Add ajinomoto, salt, pepper and sugar and
fry for further 3 minutes.
4. Add soya sauce and mix well.
Assembling:
1. Take the pancake and place little filling on the
cooked side, at one end which is nearest to you.
2. Fold the left side and then the right side.
Holding the sides, roll upwards. Seal the edges with
cornflour paste, made by dissolving 1 tsp.
of cornflour in 1 tsp. ofwater.
3. Heat some oil in a pan and shallow fry the rolls
on all sides till golden brown.
4. Drain on a paper napkin and cut diagonally
into 1 inches pieces.
5. Serve hot with chili-garlic sauce.

Monday, December 12, 2011

Chinese Food Bak Chang Recipe

We’ve finally reached the third installment in the Bak Chang series and today, I will feature our family Bak Chang recipe. Now, this recipe is definitely not for beginners as a considerable amount of skill and estimation on ingredients are required. You see, with home-cooked food, we don’t measure ingredients using measuring spoons or cups. Rather, it’s a lot to do with estimation or what the locals call “agak-agak” (“estimate”). So, this recipe is a guide for you so that you roughly know what ingredients go into the Bak Chang and how is is prepared and cooked.
This Bak Chang recipe is quite close to the Nyonya Bak Chang especially in the taste department. It is probably world’s apart from Cantonese Bak Chang which tends to be a bit on the saltish side and contains bigger chunks of ingredients. Those who are fond of eating saltish Bak Changs might find this not suited to their palate because our Bak Chang recipe is sweet and saltish with a slight emphasis on the former. Nevertheless, for those who are craving for a slightly sweetish Bak Chang, this might be the recipe you are looking for. In this recipe, we are looking at making approximately 25 Bak Changs depending on how you wrap the Bak Chang.
Ingredients
1 kg glutinous rice (washed, pre-soaked for 4 to 6 hours and drained)
1 kg pork (lean pork from the fore thigh, cut into small cubes not more than 1cm sides)
300 grammes dried winter melon (cut into small cubes not more than 1cm sides)
250 grammes dried prawns (rinsed and pounded)
15 pieces chinese dried mushroom (pre-soaked till soft and cut into cubes not more than 1 cm sides)
8 shallots (sliced thinly)
1 bulb garlic (chopped)
60 pieces Bak Chang bamboo leaves (washed thoroughly and boiled for 15 minutes to soften)
5 tablespoons cooking oil
10 pieces pandan leaves (knotted)
Reed or Banana stem reed to tie
Seasoning
2 teaspoons salt
3 tablespoons dark soya sauce
4 tablespoons coriander powder (ketumbar)
Liberal dashes of white pepper powder
Method
Heat 2 tablespoons cooking oil in wok and fry 1/2 the garlic and shallots till aromatic. Add glutinous rice, 1 tablespoon of dark soya sauce, 1 tablespoon of ketumbar and 1/2 teaspoon of white pepper powder. Stir well. Remove and leave to cool.
Heat up 3 tablespoons of cooking oil in wok and fry the other half of garlic and shallots till aromatic. Add dried prawns and stir till aromatic. Next, add mushrooms and pork. Stir well followed by adding of winter melon and seasoning to taste. Stir till even and pork is cooked. Set aside to cool.
Wrap the Bak Changs. Bring to boil a large pot of water and throw in the pandan leaves. Boil Bak Chang for 3 hours completely submerged and covered. For best results, use a charcoal stove. For quick cooking, use a pressure cooker and boil for approximately 45 minutes on pressure and 15 minutes standing.

Thursday, December 8, 2011

Enjoy The Stuffed French Toast

My mom’s friend, Anita made this stuffed french toast for my bridal brunch when I got married. I’ve had the recipe for a while but have just never gotten around to making it. This past weekend my bible study had a surprise brunch for one of our friends and I thought I would make this. Everyone immediately asked for the recipe! It was so delicious!! This is definitely great for a brunch because you make it the night before and then bake it the morning of.
Ingredients:
16 ounces loaf French Bread (18 slices)
8 oz. cream cheese (1/4 inch slices) (use fat free if desired)
3 oz. additional cream cheese (1/4 inch slices) (use fat free if desired)
12 large eggs
2 cups milk
1/3 cup maple syrup
dash of cinnamon
1 tbsp. sugar
Directions:
Line greased 13×9 baking dish with 1/2 of bread slices, top with cream cheese slices and rest of bread. Combine the rest of ingredients, pour over the bread. Cover and chill for 8 hours.
Let stand at room temperature for 30 to 45 minutes prior to baking.
Bake at 350 degrees for 45 minutes, lightly covering with foil after the first 20 minutes.
Serve with additional syrup to pour over top of individual slices.

Monday, December 5, 2011

New York Style Pizza

New York pizza is my favorite style of pizza. Sure, I love me a neo-Neapolitan, sit-down-with-a-fork-and-knife on occasion, and grilled pizzas are fantastic in the summer. Even chewy, Roman-style pizza bianca has its place. But the pizza I find myself most often craving is of the simple, by-the-slice, medium-thin, crusty and lightly chewy style.
Luckily for us, it's also the variety that seems most easily adaptable to the home kitchen. Unlike, say Neapolitan pies which require wood-burning, 1000°F ovens (or at the very least a reasonable workaround), the modern* New York pie is baked in gas ovens that don't often go north of 500 to 550°F or so—a temperature range not out of the pale of even the most bog-standard home oven fitted with a pizza stone.
So what is it that makes a New York pizza unique?
First of all, it's the sauce. It's an emphatically tomato-ey sauce with a balanced sweetness and acidity and the barest hint of herbs and alliums. I tackled this sauce in a previous Pizza Lab post (the secret is a mix of butter and olive oil, using whole tomatoes, dried oregano, a couple of halved onions that get removed, and a slow simmer on the stovetop). No problem.
Next, it's the cheese. Unlike a Neapolitan, which uses fresh mozzarella, New York-style pizza uses grated, dry mozzarella—the kind you can get sliced on a meatball sub or wrapped in cryovac blocks near the milk. It's applied sparingly so that it melts into a loose matrix that mingles with the sauce underneath, browning ever so slightly in the heat of the oven. The top of a New York-style pie should look mottled with red, white, and brown, definitely not a solid expanse of white melted cheese. With a couple pies under your belt, you'll quickly discover two things about the cheese: it must be full-fat mozzarella (the part skim or low-fat stuff just doesn't stretch right), and you must grate it yourself. No matter how much you are tempted, do not buy pre-shredded cheese. Shredded cheese is coated with a dusting of potato or cornstarch intended to keep it from clumping. What it ends up doing is preventing it from melting properly. Your cheese will not acquire the requisite goo-factor. I've found that the best way to get good cheese for pizza at the supermarket is to go to the deli counter and ask them to cut you a pound or so straight off the slicing block in one chunk. Grated on the large holes of a box grater, it's perfect for the job.
Here's a problem I used to have: the cheese would overbrown and burn before the crust was done cooking. This happen to anyone else? I don't know if it's because professional pizza ovens have different convection patterns or some other sort of thermodynamic oddities going on, but the only solution I've found is to grate the cheese onto a plate, then pop it in the freezer for 15 minutes before applying it. This slows down its cooking just enough so that the crust can catch up before the cheese starts to burn.
The final factor that makes a great New York pizza—and this is the real key—is the crust. This is what separates the men from the boys. The New York slices from the Sbarros. The true Ray's from the hordes of imitators.**
Let's take a closer look, shall we?
Thicker than a Neapolitan crust but thinner than a pan pizza, a New York crust starts with a crisp, well-browned bottom layer about 2 millimeters thick. It must be sturdy enough that a single slice slightly bent lengthwise down the center will cantilever out straight under its own support, not requiring the eater to prop the tip with a second hand. There's nothing worse than walking out on the street with a slice, having the tip sag down, and the cheese slip off into a greasy puddle on the sidewalk. Even thinking about it makes my eyes well up.
The crust has to be sturdy enough, but—and this is important—just sturdy enough. Crunchy, tough, or cracker-like are not adjectives that can ever accurately describe a great New York pizza. The slice must crackle and give gently as you fold it, never crack or split.

Thursday, December 1, 2011

Food And Wine Harvest Holiday in Le Marche, Italy


If you call yourself a "foodie," pig lover, wine-o, tartufaio, gourmet or gourmand this culinary holiday is for you! Vegetarians seek refuge elsewhere because for five nights in October it's a carnivore's delight in the foothills of the Apennine Mountains of Central Italy. This fall savor the slow food & experience Italian farm life first hand with this unique holiday at La Tavola Marche (Organic Farm, Inn & Cooking School) for mushroom hunting, pig butchering, sausage making, chicken slaughtering & butchering with hands-on cooking classes incorporating the fresh butchered meats and a fabulous wine tour & tasting. The first night you are welcomed to the 300 year old stone farmhouse with the rich smells of a slow roasting fire escaping through the kitchen door, a feast to be remembered with each of the five courses paired with local Marche wines and topped with truffles.At La Tavola Marche you know where your food comes from; vegetables fresh picked from the garden, eggs from the hens, truffles foraged from the hills and fresh meat from our free-range chickens or the next door neighbor. Spend the morning with our local butcher in Urbania for a demonstration on butchering, follow the process, identifying and trimming different cuts of pork, learning the best cooking technique for each cut well as a range of basic butchery skills. Learn the basics of the aging process, how to make salami, cured meats and sausages. Back at the farmhouse we will stuff our own sausages to grill over the open fire for dinner! After a day of meat, relax the following day by sampling the best family-run vineyards of Le Marche with a full day wine tour & tasting. Later in the week hike into the woods to forage for mushrooms then get down & dirty; slaughter & butcher our free range chickens incorporating it into cooking class for classic stock, stews & roasts.Includes: Five nights accommodations, welcome five course feast, two full day cooking classes, wine tour & transportation, mushroom hunt, butchering class, breakfast daily, three lunches, four dinners, evening snack, wine with meals, heating, all taxes. Price based on double occupancy. Special discounted rate for group of 4 or more.
WINE TOUR:
Enjoy a half-day private guided wine tasting & tour with lunch by an Italian wine expert of the best family-run, most characteristic vineyards of Le Marche. You will have the chance to visit a cheese factory, honey producer, an oil mill, wineries and of course taste all those products.
SLOW FOOD:
The night of your arrival devour our five-course feast, prepared with fresh truffles and fresh ingredients from our garden, each course paired with wine from a local Marche vineyard.
FARM LIFE:
From collecting eggs from the hens to slaughtering the chickens for winter it is all part of life on the farm. Visit our local butcher for a morning lesson in chartucerie and butchering with lunch at a local Osteria after. Take a walk into the woods foraging for wild mushrooms.
COOKING CLASS:
Using the fresh butchered meats Chef Jason will teach you how to make the fundamentals from soups & stocks to slow roasting & braising.

Sunday, November 27, 2011

Holiday Recipes You Can Make in Your Crockpot

Are you always short oven space when preparing holiday meals? Let your crockpot or slow cooker help you out. This article has recipes for Diabetic Sweet Potato Casserole and for Bread Dressing. Now how about that for convenience? And aren't we all looking for convenient ways to help us with those large meals!
BREAD DRESSING
1 cup butter
2 cups chopped onion
2 cups chopped celery
1/4 cup coarsely chopped parsley
2 cans (8-oz) mushrooms, drained
12 to 13 cups dry bread cubes
1 tsp poultry seasoning*
2 well-beaten eggs
1 1/2 tsp salt*
1 1/2 tsp sage*
1 tsp dried thyme*
1/2 tsp black pepper
1/2 tsp marjoram, optional*
3 to 5 cups chicken or turkey broth
Melt the butter in a skillet; saute the onion, celery, parsley, and mushrooms.
Place the bread cubes in a very large heat-proof bowl. Pour the butter/vegetable mixture over the bread crumbs. Add the poultry seasoning, salt, sage, thyme, pepper, and marjoram, if using; toss together well to blend in the seasonings. Pour in enough broth to moisten to your desired amount of moisture. Add the well-beaten eggs and mix very well.
Lightly spray the crockpot or slow cooker with nonstick cooking spray. Pack the dressing into the cooker. Place lid on cooker and cook on high for approximately 45 minutes. Reduce the heat to low setting and cook for 4 to 8 hours.
*Omit if using packaged stuffing mix.
Because you are dealing with raw eggs, be sure to follow the instructions and heat on high first!
DIABETIC SWEET POTATO CASSEROLE
This casserole uses Splenda for those who avoid sugar. The other recipe (below this one) uses actual sugar and brown sugar. This recipe is for diabetics or anyone who avoids sugar.
2 cans (18-oz each) sweet potatoes, drained & mashed
1/3 cup butter, melted
2 tbsp Splenda Granulated
1 tbsp Splenda Brown Sugar Blend
1 tbsp orange juice
2 large eggs, beaten
1/2 cup milk
In a large bowl, mix the sweet potatoes, butter, Splenda granulated, Splenda Brown Sugar Blend together. Beat in the orange juice, eggs, and milk.
Lighly spray the crock of the slow cooker or crockpot and transfer mixture to the cooker.
Topping:
2 tbsp + 2 tsp Splenda Brown Sugar Blend
1/3 cup chopped pecans
2 tbsp flour
2 tbsp butter, melted
Combine the Splenda, pecans, and flour. Add the melted butter stirring until combined. Spread topping over the sweet potato mixture.
Place lid on cooker and cook on high setting for 3 to 4 hours.

Thursday, November 24, 2011

Tips For Fine Lobster Cooking

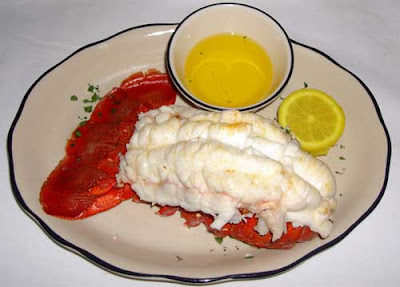
Enjoying fresh, moist lobster is a fine delicacy, and thankfully preparing a live lobster is rather easy! One warning any chef will share is that it is important to cook it immediately and to avoid over-cooking, and therefore drying out the delicate meat. A fresh and thoroughly cooked piece of lobster will be white in color, firm, and juicy. To prepare a lobster and keep it’s fresh from-the-sea flavor Fine Lobster recommends several traditional cooking techniques.
The easiest, most delicious way to cook a live lobster is by boiling as takes least amount of time. Start with a big pot and fill it with seawater (easy for those close to the ocean) or with water heavily salted, roughly about two gallons of water per three pounds of lobster. Thankfully, being crustaceans, they are similar to other arthropods (such as insects) and have a very primitive nervous system that lacks a cerebral cortex, or the part of the brain in humans that detects pain. Therefore, the best process is to place the live lobster head first into boiling water. An easy rule of thumb is to boil the lobster for about eight minutes per pound, and it will be cooked thoroughly but not over done.
Another Fine Lobster recommendation is to steam your live lobster, as it is harder to over cook them and equally delicious as boiling. Select a pot large enough to hold all of the lobster without crowding them, place a steaming rack and about two inches of seawater (or heavily salted water) in the bottom. Over high heat, bring it to a boil, and add the live lobsters one at a time and cover. Steaming takes about ten minutes per pound, but halfway through ensure they are cooking evenly by shifting them around being careful of the hot steam.
Finally, one cooking technique that is often used is parboiling, or partially cooking the meat to later finish it. Parboiling is a great technique for when one wants refrigerate or freeze a whole lobster to finish cooking it later when needed. This also works well to later include the meat in a stir-fry, or even finish it on a grill and avoid drying it out. Before placing the parboiled meat on a hot grill, be certain to brush it with olive oil to avoid it sticking or drying out.
Parboiling follows the same rules as boiling, however only cook the lobster for about two minutes per pound instead of eight. Be sure when done to immediately rinse it in cold water to stop the cooking process. Unless leaving the meat in the whole shell to freeze or refrigerate and finish boiling later, it is advised you remove the meat as this is when it will be easiest. If planning on finishing the meat on the grill, serving a lobster tail on the shell creates a beautiful presentation (it is also easier to handle while grilling!) Simply snip the tail shell lengthwise and pull the meat out and rest it on top of the shell, leaving it connected nearest the tail flipper.
No matter how you prepare it, there is nothing like a fine, fresh Maine lobster to compliment any special occasion. We recommend pairing it with clarified butter or sauce and a fine white wine will bring out the best flavor of the lobster.

Monday, November 21, 2011

Delicious Food Services in Miami

Miami is one place in Florida where people are very concern about their food habits and what they eat. Good food along with healthy food is what mainly constitutes the idea of food in Miami. This is actually a very good eating habit which most of the people in the world do not follow. Miami Catering is also very famous for its delicious food served with healthiness.
Whenever there is a party in Miami, catering companies have their share of talent to show but, catering in Miami is as beautiful as the beach present there. Miami catering companies can cook different cuisine foods and along with different cuisine food they add fresh ingredients and healthy ingredients to make your meal full.
They also have different meal plans for everyday where they have different food for different people having different daily regimes. For example the food for a sportsmen is completely different from an actor, again the food for an actress is complete different from a normal human being. Catering in Miami have taken new leaps and their sole idea of serving people with delicious yet healthy food have earned them a very good name in many different places not only restricted to Florida.
Another best thing that Catering in Miami has is if you are not very well and do not feel like cooking, these catering companies provide you cheap meals delivered at your home just at a very small and reasonable price. Many such services are also opening at nearby places and also at different parts of the world but Miami still counts for the best in the market with their wonderful idea.

Wednesday, November 16, 2011

How To Cook The Delicious Food

     Dawn Roads from Aga will show you how to cook delicious seasonal food in the Museum of Iron café at Coalbrookdale on Wednesday, 6th April from 7-9pm.
Dawn Roads from Aga will show you how to cook delicious seasonal food.
Fresh from the oven, guests will have the chance to try fabulous dishes such as chocolate cake, Moroccan tagine, meringue roulade, hot cross bun pudding and goats cheese and asparagus tart – all with a glass of wine.
     There will also be a chance to buy Aga cookware at a discount and tickets include free entry into the Museum of Iron from 6.30pm – 9.30pm. The evening is being held to support the Museum and its charitable aims.
      Ruth Brown, Fundraising Manager, says: “This promises to be a fantastic event for anyone who loves Agas, cooking or eating. Aga has a long history in Coalbrookdale and we thought it would be a great idea to join forces and host an evening, which will support the Museum and inspire people to cook some brilliant spring and Easter themed food.

Friday, November 11, 2011

Tips For Delicious Food lover

  Most of us think that we eat mainly to nourish the body and keep it fit and healthy. In fact, the food we eat plays a much greater role in our lives because it influences the way we think, feel, act and react every moment. It affects our faculties and behaviour. As many of us are aware, the food we eat has three qualities – inertia or tamas, aggressiveness or rajas and purity or satva. If we eat satvic food, it increases the purity in us. When our internal state is pure or satvic, we grasp things very easily and learning is instantaneous. When we eat tamasic food, our power of comprehension becomes very clouded and we find it extremely hard to accept and assimilate new concepts. When we are rajasic, we are apt to go off at a tangent and lack the ability to identify or resolve the salient issues in any situation. So our inner state of being depends on the food we eat as well as the company we keep and the efficiency and effectiveness of our outer actions depends on our inner state of being.
  To put it in a nutshell, “what goes in is literally what comes out.” This is the absolute truth. When liquor is imbibed, what comes out is slurred speech. When meat goes in, what comes out is insensitivity to another’s pain. If we put a person who eats satvic food and another who doesn’t into the same traumatic situation, what happens? The rajasic or tamasic person will not even think of praying for the intervention of Divine Grace. His sluggish or aggressive reaction will aggravate the situation and make it more traumatic. The satvic person, on the other hand, will immediately surrender to God and seek Divine help. Then the traumatic situation is instantaneously resolved and passes by harmlessly. So the kind of food you eat decides what kind of person you are and how you shape your life.

Wednesday, November 9, 2011

Bubblegum Cupcakes


I made these for Cupcake Camp London 2010 and they were my second most popular flavor on the day. The kids really loved them. They’re just so fun who could resist! I was really proud they came in as a runner up in the most unique ingredient contest.
My popcorn cupcakes would make good companions to these as well.
They were made with white chocolate chip cake, filled with bubblegum pudding and then topped with Bubblegum buttercream. The pudding was bubblegum flavored Snack Packs that are typically sold in any US grocery store.
They look really cute all together.
All my varieties for Cupcake Camp. Click here for round up.
White Chocolate Chip Cupcakes
adapted from Martha Stewart (makes 24)
Ingredients
3 1/4 cups self rising flour, sifted
4 1/2 tsp baking powder
1/4 tsp salt
1 tbs vanilla extract
1 cup plus 2 tbs milk
1/2 cup plus 6 tbs unsalted butter at room temperature
1 3/4 cups sugar
5 large egg whites at room temperature
2 cups white chocolate chips
bubblegum snack packs (4 filled all the cupcakes)
I got these from Bake it Pretty
1. Preheat oven to 350 F/180 C. Line muffin tin with cases (these popcorn buckets stand on their own). Whisk together the flour, baking powder and salt. Stir the vanilla into the milk to combine.
2. With an electric mixer on medium speed, cream butter until smooth. Add the sugar in a steady stream, beat until pale and fluffy. Reduce speed to low. Add flour, mixture in three batches, alternating with the two additions of milk mixture, and beating until just combined after each.
3. In another bowl, with an electric mixer on medium speed, whisk the egg whites until stiff peaks form. Fold one-third of the egg whites into the batter to lighten. Gently fold in the remaining whites until just combined. Toss the chocolate chips in one tablespoon of flour and gently fold into batter.
4. Divide batter evenly among lined cups, filling each three quarters full (I usually do 2 cookie scoops worth of batter for each cup). Bake, rotating tins halfway through, until cake tester inserted in center comes out clean about 22 minutes. Transfer to a wire rack to cool.
5. When completely cool cut out the center of the cupcake in a cone shape and scoop in two teaspoons of pudding. Place a small piece of the cut out section back on top.
Bubblegum Buttercream
Ingredients
3 cups unsalted butter at room temperature
2 pounds icing sugar, sifted
1 tsp vanilla extract
Pink food coloring
2 vials bubblegum flavoring
gumballs for decoration
I got these at the $1 Store in the US. They also have them at Cyber Candy in London
1. With an electric mixer, beat the butter on medium-high until pale and creamy, about 2 minutes.
2. Reduce speed to medium. Add the icing sugar ½ cup at a time, beating after each addition and scraping down sides of bowl as needed; after every two additions, raise speed to high and beat 10 seconds to aerate the frosting, then return to medium. This should take about 5 minutes. Frosting will be pale and fluffy.
3. Add vanilla, and beat until frosting is smooth, add small amount of pink food coloring to achieve a pink color, and beat until color shows through. Add both vials of bubblegum flavor and beat until combined.
To Decorate
Pipe frosting in big swirls and add the sprinkles you want first before the icing becomes stiff.
Or pour some sprinkles into a bowl and roll the edges of the cupcake in. Or pipe the bottom swirl, roll in the sprinkles and then continue and pipe on the top swirl.
More details and photos about decorating and sprinkle techniques can be found here.

Sunday, November 6, 2011

Masterchef Live 2010

I love food shows. I try to get to all the ones that come to London each year. I love looking for new, different and interesting food. I took lots of photos while at Masterchef. Click here to see them all.
Juan Sheet is Plenty (what happened to Brenda and Audry?)
I watched the invention test first. I thought about signing up but I don’t think I could think so quickly and cook without any recipes in front of me.
Jon and Gregg getting ready to judge the entries
I got Gregg’s Pudding book. I thought if I ever move back to the US I can impress at dinner parties with an English dessert. Can’t believe that they didn’t look up! Oh well…
I bought a few bars of Seed & Bean chocolate. The Lemon & Poppy seed was excellent.
Therapeutic Chocolate. Weird.
Giant Italian Sandwiches.
They have at least 3 different kinds of Toffee Vodka at every food show I’ve ever been too. I think it’s vile!
Bramley & Gage were selling mini bottles of liquor which I thought would be perfect for cupcakes.
I tried a sample of an African Yam. Interesting. Tastes a lot like a potato.
There were a few cupcake things but nothing that shouted out at me really. Holly Cupcakes had some good extracts imported from the US. I bought a bottle of Pineapple.
Powdered vanilla?
I liked these Glorious Soups.
This Harp & Lyre Tea was really nice. It will be on sale over the Internet soon.
I love this Revolution Tea! I’ve bought it at several different shows.
I bought some caramel, coconut & cinnamon popcorn from Joe & Seph’s.
I bought some restaurant tokens with my tickets. I loved this chocolate cake from Theo Randall
Slow Roast Pork from…Roast
Platter from Ming Jiang
Blueberry Cheesecake with Lemon Curd from The Luxe. It was only OK nothing special.
Chicken Satay from Bintang. Very good.
Lisa Faulkner’s Rhubarb & Custard Crumble
I had a really good time and went home completely exhausted and stuffed! I can’t wait for Taste of Christmas already!

Thursday, November 3, 2011

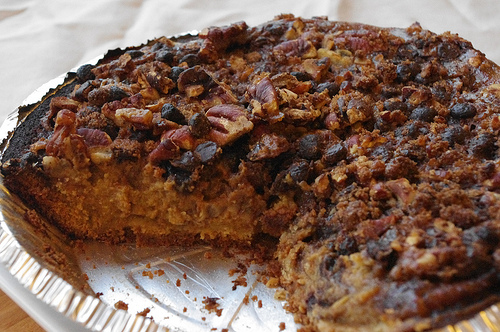
Pumpkin Pie with Crunchy Pecan Topping

I love Thanksgiving and it’s such a bummer that I have to go to work each year. I would love to stay home and cook all day! Maybe I can stay home on our newly minted bank holiday, April 29th, and bake cupcakes in honor of the royal wedding.
I love Thanksgiving even more now. When I was studying to to be an accountant one sitting of the exams always fell on Thanksgiving. Between going to work all day, studying at night and on the weekends there was no time to bake pie. Now that I’ve been finished for some time I enjoy this time of year even more (really makes you appreciate your free time).
This is a basic Pumpkin Pie recipe but instead of evaporated milk I used vanilla soy milk to make it dairy free and it tastes exactly the same. I can only eat Pumpkin Pie with some kind of biscuit base. I think all the spices in the pie are complimented by the cinnamon in graham crackers or the ginger in ginger nut biscuits.
I love this topping (from Bakerella). It’s so amazing. The chocolate chips and the pecans are just heavenly. I should have maybe put some aluminium foil over the top towards the end so the edges didn’t get so crisp.
Dairy Free Pumpkin Pie
adapted from Sunset
Ingredients
Pie
3/4 cup sugar
1/2 tsp salt
1/4 tsp ground ginger
1/8 tsp ground nutmeg
1/8 tsp ground cloves
1 can (15 oz) pureed pumpkin
1 1/4 cups vanilla soy milk
2 eggs
Crust
Graham Cracker shell purchased
or Ginger Nut biscuit base (300g ground biscuits mixed with 80g melted butter and pressed into a pie shell)
Topping
1 cup chopped pecans
1/2 cup chocolate chips
1/2 cup packed brown sugar
2 tbs maple syrup
1. Pre-heat oven to 425 F/ 220 C. In a large bowl, mix sugar, cinnamon, salt, ginger, nutmeg and cloves.
2. Add pumpkin, soy milk and eggs. Whisk until well blended. Pour into the pie shell. I had a little leftover so don’t overfill your pie.
3. Mix all of the ingredients for the topping in a small bowl and set aside.
4. Bake the pie for 15 minutes then reduce temperature to 350 F/180 C and gently pour the topping mixture evenly over the top of the pie and bake for 45 more minutes until a knife inserted in the middle comes out clean (place a piece of foil over top towards the end if getting crisp on top. (I meant to make mine a bit crisp…).
5. Set the pie to cool on a rack for at least 2 hours.

Tuesday, November 1, 2011

Christmas Giveaway!

It’s only 23 more days till Christmas! Have you put your tree up and bought all your presents yet? Or is everyone waiting until Christmas Eve for that!?
To help, CSN and their really fabulous Coffee Tables site are sponsoring another fantastic giveaway. If you’re looking for a little something to spruce up your living room this is a great site. I never knew there were so many different kinds of coffee tables.
-Any of my US or UK readers can enter to win a $40 gift certificate to any of their 200 stores. Get something for someone special or treat yourself!
Rules
1. Enter by 12pm GMT Friday Dec 10th by leaving a comment below this post stating what your favorite Christmas cookie is. If you’re also a follower leave another comment stating so to get a second entry. Competition is now closed
2. Shipping costs are not included
3. Gift certificate is $40 or the GBP equivalent (UK winner must shop at the UK store).4. Winner will by chosen using random.org

Sunday, October 30, 2011

M&M Cookies

m&m cookies were always a staple at our house during Christmas. My mom always made them in addition to snickerdoodles and those peanut butter cookies with the Hershey kiss on top.
They just this Christmas season started having the red and green only m&m’s in the UK. Only about 20 years behind the rest of the planet! I couldn’t find an exact date they were released but the first TV advert where the m&m “spokes candy” put out a bowl of green and red m&m’s for Santa was 1990.
I could only find peanut green and red ones at Waitrose and they were packaged in a special tube. I couldn’t find regular red and green ones in just a regular bag!
I had to settle for the regular colors instead this time
I had a check on the net and there are a minimum of 11 different kinds of m&m in the US (not including the “premium”, minis or ice cream). There are 3 in the UK: plain, peanut butter and crispy. The crispy ones are apparently the most profitable and strangely aren’t sold in the US any more. What’s your favorite kind? I’m partial to peanut and the new pretzel ones which I had when I went home in August. I hope they come to the UK soon!
M&M Cookies
adapted from Martha Stewart makes 3 dozen
Ingredients
2 1/4 cups plain flour
1/2 tsp baking soda
1/2 cup sugar
1 cup light brown sugar, packed
1 tsp salt
2 tsp vanilla
2 eggs
2 cups plain m&m’s
1. Preheat oven to 350 F/180 C. Whisk together the flour and baking soda in a small bowl and set aside. Put the butter and sugars into a large bowl and cream with an electric mixer on medium speed for 2 minutes.
2. Reduce speed to low and add the eggs, vanilla and salt. Mix well until blended.
3. Mix in the flour and then fold in the m&m’s with a spoon or spatula.
4. Drop a tablespoon of dough onto a non stick baking sheet, spacing each 2 inches apart and bake for 10-12 minutes until golden brown. Let cool for 2 minutes before transferring to a wire rack.
my sister sent me this cute cookie scoop.

Thursday, October 27, 2011

Masterclass at Dri Dri Gelato Notting Hill

I was invited for another gelato masterclass! This time by Qype. What a lucky girl am I? I’ve been to two gelato making classes now! Click here and here to read about my previous lesson. I took a lot of pictures. Click here to see them all.
Dri Dri Gelato opened on Portobello Road in summer 2010. They use organic and seasonal ingredients to make authentic Italian gelato. Even though I’ve already been on a class the two places are different and I learned a few new things!
Dri Dri serve their gelato in a traditional pozzetti counter. This type of counter is strictly temperature controlled. The gelato contains no emulsifiers or thickeners and would melt in the usual open case freezer you typically see.
They also serve coffee and traditional Italian hot chocolate. I love this stuff. It’s so thick and chocolaty.
Gelato is apparently a more healthy choice than ice cream. It uses milk rather than cream. Gelato is 6% fat compared to ice cream at 18-24%
For our class we were making Granny Smith Apple Sorbet.
Roughly chopping up the apples
The apples are then thrown into a juicer. Obviously, I was too excited about all that gelato to remember to not turn my camera so if you have a laptop flip the screen around!
The apple juice, lemon juice and sugar mixture are all whisked together with some water.
The mixture is then poured into the gelato maker.
Adriano has an authentic 1960′s Italian gelato makeer which was pretty cool.
It’s cool how it churns. It only takes about 20 minutes for the gelato to become thick and creamy!
But how to get all the gelato out of the machine? A giant paddle of course!
There’s Eamon who works at Qype giving it a go.
The finished product! It tasted amazing. The flavor of the apple was so clean and crisp. It really did taste natural.
Adriano was nice and let us pretty much taste every flavor. The William and Kate was not only cute it was also one of the best tasting! My only regret is not tasting more gelato! I left hungry and not stuffed like I had hoped.
I enjoyed my class at Dri Dri. It’s a cute shop that has a nice friendly neighborhood feel. It’s more expensive than your average ice cream shop but you can taste the quality and it’s worth a trip to Notting Hill if you’re ever in the area. The gelato flavors change with the season so expect to be amazed!
Thanks to Qype and Adriano for inviting me! Can’t wait for more Qype food events!

Tuesday, October 25, 2011

Cupcake Camp Bournemouth

I attended Cupcake Camp Bournemouth recently. The event successfully raised over £1,800 pounds for Macmillan Cancer Support. I took a lot of photos on the day, click here to see them all. A lot of hard work into organizing the event.

I donated Chocolate Pretzel Man Cakes. There aren’t any cupcake shops in Bournemouth (as far as I know) but there are plenty of home businesses in the area. Nearly all of the cakes donated were from professional bakers. I really wanted to take a picture of each kind donated but it was too busy and the cupcakes dissapeared really quickly!

Here are some of my favorites from the day (if anyone knows who made these let me know and I’ll update each photo).

Bournemouth Beach Hut by Lucy’s Sugar Shack

Fish n’ Chips also by Lucy’s Sugar Shack

Mother’s Day Cupcakes

This was the best tasting cupcake of the day I think! It was a nut and spice combination.

On the whole I left the event feeling a little disappointed. When I left the last cupcake camp I attended, I left on such a high (not just a sugar high). This event had a different vibe.

I felt it was over before it even started. The event was advertised to start at 2pm and run until 5pm. When I arrived at 1:40pm to set up my stand people were already taking cupcakes. I wasn’t pleased when people kept trying to take them before I’d finished getting my display ready! The judging competition was also finished before the start and by 3pm all the cupcakes were gone and it was over. The good news is that people seemed to enjoy themselves and there were lots of kids having fun.

As a baker, in my opinion, I was disappointed that the businesses gave themselves a big profile and I thought the charity seemed to take second place. The event was organized with good intentions however.

I am excited for the next cupcake camp and I’m already thinking about some mind blowing creations!

Sunday, October 23, 2011

Willie’s Easter Egg Factory

Willie Harcourt-Cooze “transported” his chocolate factory from Devon to The Tabernacle in London for the day shortly before Easter. He gave a Bean to Bar talk, let everyone make their own Easter egg and hosted a reception with drinks and canapes from his new book ‘Willie’s Chocolate Bible’. Click here to see all the photos I took.
There were loads of people at the event. It was free and open to the public.
Willie started with his “Bean to Bar” talk. He is very passionate! He is the UK’s only independent grower and producer of cacao.
Raw Cacao
The talk consisted of him simultaneously telling us how he got into producing chocolate, the process of how it’s made and making a chocolate mousse cake all at the same time!
Roasted Beans
Beans grown in different regions will have different under tones. Just like with wine. Grapes grown in different regions will taste different.
100% Cacao
We were tasting the different stages as Willie discussed them, which was fun. The raw cacao bean was not very tasty!
Willie made a chocolate mousse inside a chocolate case. He lined the tin with parchment paper and spread the chocolate all up and around so when it was removed it had a bit of a ruffled look.
We got to taste a sample. Willie bought the molds for the mousse from the old Terry’s of York factory after it closed.
And a hot chocolate sample
After that the Easter egg making, chocolate tasting and book signing began.
I bought a copy of the book and look forward to making the chocolate and porcini risotto.
There was a row of chocolate fountains with different types of chocolate to taste. Of the 6 there were two that I really loved!
The Indonesian 69 Javan Light Breaking – Sourced from the Island of Java, these bars are made from a highly prized strain of cacao. The beans are visually striking as they are exceptionally light in color and they have a slightly higher cacao butter content than usual. The beans produce a surprisingly light dark chocolate with soft caramel notes.
The Peruvian 70 San Martin – The beans are sourced from the Departmento de San Martin in Northern Peru in the foothills of the Andes in the lush Amazonian rainforest’s. The beans are grown by small farmers, who are part of a cooperative who provide them with technical and marketing assistance and credit to help increase productivity and profitability. The beans from this region are naturally fruity with tropical fruit flavor notes.
Giant Easter Egg for Great Ormond Street
The staff spent over five hours helping everyone make Easter eggs! They were still going when I left at 8.30pm. Chocolate is poured into the mould. The two halves of the mould are put together and closed with some pins and shaken vigorously. It was then popped into the freezer to set quickly.
It’s a little dark but you can see how the foil is applied to the egg.
Chili and Cacao Nib Tea while we waited for all kids to finish making their Easter eggs.
Malambo provided the entertainment by playing South American music.
Then came the cocktails! Chocolate Sloe Vodka.
The guy sitting next to me thought drinking 8 in one go was a good idea.
It’s not a party without some bubbly.
Willie’s Bloody Mary. I’ve never actually had one before and I loved it.
Cacao and Olive Bread with Smoked Salmon
Wild Mushroom Stew (this was fantastic)
Roe Deer with Chocolate Gravy and Spiced Red Cabbage
Mole Negro with Chicken Breast. The moistest chicken I have ever tasted I think.
Chocolate Cake
This might have been White Chocolate and Orange Blossom filled chocolates.
Willie’s Walnut Whip
Completely stuffed and happy I left and took my Easter egg home!
During Willie’s demonstration he also while making the mousse whipped up his favorite South American breakfast. I made it at home and it was pretty good!
Willie’s South American Breakfast
1 serving
Ingredients
1 egg
half an avocado
1 piece of bread
chili oil
1. Toast the piece of bread and spread the avocado on top (it’s a healthier replacement for butter).
2. Fry the egg and place on top of the avocado and sprinkle with some chili oil. I used some chili infused olive oil from Waitrose.

Tuesday, October 18, 2011

Fiona Cairns Bake & Decorate Book Review


About a month ago Quadrille contacted me and asked if I would be interested in reviewing Fiona Cairns new decorating book, Bake & Decorate. I had seen her cakes in Selfridges before but I didn’t know she had written any books! One look at that pretty cake on the cover and I was sold. I have a serious cookbook addiction. I’ve amassed about 30 baking ones in a year!
  The press release says this is her first book. I looked on Amazon and there is another Bake & Decorate. I’m thinking this is a re-issue. I would be curious to know why it was re-issued a year after the first. Maybe this is the new and improved version? After I did all my writing and baking from this book I went and read other reviews (of the older issue). Some criticized the decorating ideas as childish. I think with a little imagination the basic ideas she presents are more than inspiring enough (especially for us beginners). Now on to the actual review!
  -
  The book is billed as “easy decorating ideas for the least experienced cook for less money than you think. Fiona shows each aspiring hostess how to achieve glamorous, fun entertaining using easy techniques and tricks”. I found this quite interesting. “She makes 750,000 cakes a year for Waitrose, Harrods, Selfridges…her list of celebrity clients includes Sir Paul McCartney and Bono”.
  I thought this would be a great opportunity. I like to think that I’m pretty good at baking but when it comes to decorating I’m about as skillful as a Kindergartner with a pot of glitter! This was a good chance to see if I could improve my skills.
  It was really exciting getting a copy of the book a whole month before it was released for sale! I decided that I would make 3 different kinds of recipes each with a different decorating technique and then write my review based on how they tasted and how easy I found the decorating techniques. I made a layer cake, cupcakes and biscuits. I will post each of the recipes in the days following with full details about the decorating technique.
  Overall, I really enjoyed the book and I do feel that I learned some new tricks. I feel confident enough to try a sugarpaste decoration next time. The book is half recipes and half decorating ideas using the recipes from the first half of the book. The book is pretty thick, I think it would be a good idea to read the front of the book and also the back of the book before getting started. There are simple decorating tips buried in there!
  The one thing that a book can never teach is patience. Decorating takes patience and I don’t have much! I like to get to the eating part…
  Every recipe I made tasted good. No earth shattering recipes but good easy basics. I made a few changes here and there to suit my own tastes but the majority worked. Nothing is more disappointing than a book were none of the recipes work. The book contains more classic flavor cakes like chocolate, victoria sponge, etc as the focus is more on the decorating but there were also a few intriguing ones like star anise and clementine cake.
  The first cake I made was a White Chocolate, Cardamom and Rose layer cake decorated with glittering roses. This was a huge hit at the office as it looks stunning. The simple addition of five roses in the center really impressed. This decorating technique for the roses was buried in the back of the book. This was the most work intensive from the three recipes I tried.
  Second up I made iced, layered shortbread biscuits. These tasted great and making the cookies with a little window and an icing drizzle really made them stand out. They would have looked a bit neater if I had actually followed the directions. That’s another story though. This was the easiest decorating technique of the three.
  Lastly, I made Mint Cupcakes. The chocolate cake was perfectly light and moist and I tried my hand at making crystallized leafs. This was only medium hard. A few turned out really nice and the rest stuck to the pan! The icing was the biggest disappointment of the book and I had to change the ratio of ingredients to make it work (but after that it was fabulous).
  -
  I had a great time getting into the decorating part of this book and it does exactly what it’s being sold as. This is a fun book for beginners and I think that with a little practice even I will be able to make a perfectly decorated cake in the near future! I would reccomend it for anyone looking to get a start in some simple decorating.
  The book is released on March 4, 2011. What I’ve written is not sponsored and my own opinion .

Monday, October 17, 2011

We Are Fans Of Ice Cream

Are you having trouble finding the perfect ice cream recipe? Are you wondering if you can actually make delicious gourmet ice cream from scratch? Well that is why My Home Cooking has decided to branch off and share our favorite ice cream recipes with you. Don't worry, we won't leave you stranded with confusing instructions, but will give you all the information you need to enjoy your cooking experience. We will give you simple step by step instructions accompanied by pictures that will make you glad you visited us.
This is where we will motivate you to make your own ice cream. We Will describe the advantages of making your own ice cream, and discuss the cost, quality, and health benefits of doing it yourself.

Do we have you convinced to start building your reputation as a professional ice cream chef? Well, don't worry, we provide you with recipes that will make it as easy as toast. Not only are our recipes simple, but they are bound to have you and your friends addicted for life.
If you don't have an ice cream maker or other equipment needed to make home made ice cream, but are considering buying something soon visit our equipment page. We will show you what we think is the best.
If you have some time we would like to suggest a few other recipes. Visit our links page and see what other great recipes are on the WEB. Who knows, you might find one of your soon to be all time favorites.

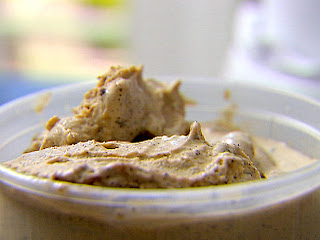
So Great Espresso Ice Cream

Ingredients
3 cups half-and-half
6 extra-large egg yolks
2/3 cup sugar
Pinch salt
2 1/2 tablespoons ground espresso coffee beans, decaffeinated or regular
1 tablespoon coffee liqueur (recommended: Kahlua)
1 teaspoon pure vanilla extract
4 ounces (1/2 cup) chocolate-covered espresso beans, chopped

Directions
Heat the half-and-half until it forms bubbles around the edge of the pan and steam starts to rise. Meanwhile, in the bowl of an electric mixer fitted with the paddle attachment, beat the egg yolks, sugar, and salt until mixed. Slowly add the hot half-and-half until combined. Wipe out the pan and pour the mixture back into the clean pan. Cook over medium-low heat, stirring constantly with a wooden spoon, for 5 to 10 minutes, until it's thickened and the cream coats the back of the spoon.
Pour the cream through a fine-meshed sieve into a bowl. Add the ground espresso beans, coffee liqueur, and vanilla and refrigerate until completely chilled.
Pour the espresso cream into an ice-cream freezer and freeze according to the manufacturer's directions. Mix in the chopped espresso beans, spoon into a container, and allow to freeze for a few hours. Soften slightly before serving.

Monday, October 10, 2011

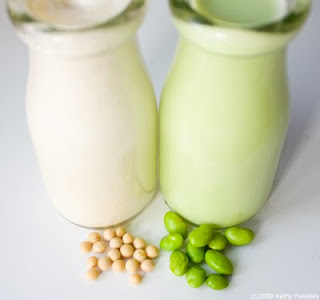
Greeen Soy Beans,White Soy Milk

A few weeks ago, I delved into the intriguing question: "If my soy beans are green, why is my soy milk white?" I described how soy milk is commonly made with mature beige-colored soy beans, thereby producing a white colored soy milk. Yet young green soy beans are commonly used as edamame and not made into milk. But I had to ask, is it possible to make soy milk out of green edamame soy beans? My curiosity got the best of me and I set out on an adventure to a) make 'white' soy milk from scratch for the very first time and b) attempt to make 'green' soy milk from edamame beans. Check out my soy milk experiment...

First, here are the general ingredients I used:
Homemade Soy Milk
vegan
1 cup soaked overnight, soy beans (dried)
*I simply heated the edamame, no soaking needed
2 cups purified water (you may need less, depending on your beans)
1/2 tsp sea salt
1-2 Tbsp maple syrup
optional: 1/4 tsp vanilla extract
*I'd suggest doubling or tripling this recipe for you batch of milk
*I've heard that adding a bit of fresh ginger can help the recipe too
Photo Recipe! For this experiment the photos are essential to understanding the 'homemade soy milk' process. It's not as easy as it sounds! (PS, my taste test review at bottom of page)

Sunday, October 9, 2011

Grass Fed Beef

Moderate consumption of lean cuts of organic grass-fed beef is an excellent source of protein and vitamin B12.Scientific evidence is accumulating that meat itself is not a risk factor for Western lifestyle diseases such as cardiovascular disease, but rather the risk stems from the excessive fat and particularly saturated fat associated with the meat of modern domesticated animals.
Studies have however strongly associated excessive red meat consumption with cardiac disease risk. High fat, grilled, pan-fried, charbroiled and processed meat are also associated with cancer risk.Both excessive red and processed meat intakes have been positively associated with cancers of the colorectum and lung.
Heterocyclic amines (HAs) are carcinogens formed during the cooking of meat at moderate to high temperatures.Commercially raised animals are fed growth stimulating hormones, antibiotics and processed grains, usually genetically modified (GM) corn that has been sprayed with pesticides.

Data published by the American Institute for Cancer Research and the World Cancer Research recommend no more than 80g (2.8 ounces) of meat should be consumed daily, preferably fish or poultry, and limited amounts that are cured or smoked.In addition to the health hazards, excessive meat consumption is placing a strain on land and water resources, contributing to water pollution, and aggravating global warming.
The ecological impact of meat production includes forest destruction in Central and South America, elimination of competitive predators in the United States, and waste produced by livestock and poultry threatening rivers and lakes. The waste generated by livestock in the United States is 130 times that produced by humans, and the meat industry is the largest source of emissions of methane, a greenhouse gas contributing to ozone depletion and climate change.In order to maximize the health benefits of eating beef, it’s strongly advised to choose free range, grass fed, organic, lean cuts, and to consume red meat in moderation.

Saturday, October 8, 2011

Florida Seafood

A recipe featuring some of Florida’s all-time favorites -- snapper, shrimp, tropical fruit and citrus -- won out over submissions by 20 other premier chefs from around the country to capture top honors at the Great American Seafood Cook-Off held August 6 in New Orleans.
Florida Governor Jeb Bush, Chef Joshua Butler, Chef Justin Timineri, and Florida Agriculture Commissioner Charles H. Bronson, celebrate Florida's top honors.
FDACS Executive Chef Justin Timineri

Justin Timineri, executive chef for the Florida Department of Agriculture and Consumer Services, prepared the winning entree during the competition with assistance from Joshua Butler, chef to the Governor of Florida.
Florida Agriculture Commissioner Charles H. Bronson said winning this prestigious national competition is a reflection on the freshness and quality of Florida ingredients, as well as the creativity of the department’s executive chef.
“Delicious fresh Florida seafood is a superb start to any dish,” Bronson said. “Add in our chef’s innovative culinary approach, and you’ve got a winning combination. We’re extremely pleased that the judges selected Florida’s entry over such tough competition from around the country.”
All the participating chefs were given two hours from preparation to the presentation of the final dish. Chef Justin Timineri's “Crispy Pan Seared Florida Snapper with Passion Fruit Cream and Florida Citrus Salad with Florida Gulf Shrimp and Spicy Green Mango Jam” was chosen by a panel of six judges as the best new domestic seafood dish that reflected the chef’s home state.
The panel of judges included two James Beard Award-winning chefs, Susan Spicer of Bayona Restaurant in New Orleans, and Shawn McClain of Spring Restaurant in Chicago. Rounding out the panel were: Donna Florio, senior food writer, Southern Living Magazine; Julia Rutland, senior editor, Coastal Living Magazine; Bill Hogarth, director, National Oceanic and Atmospheric Administration; and John Connelly, president, National Fisheries Institute.

Friday, October 7, 2011

How To Make Seafood Paellas

Seafood paellas should be made with a variety of fish and shellfish, each adding its own flavor and texture. Always include jumbo shrimp, mussels or clams, and a firm white fish such as monkfish, halibut, or sea bass. Seafood paellas are often served with a cold, fresh, dry fino sherry; however, a zesty, dry California Sauvignon Blanc works well, too.

Ingredients

  • Broth:
  • 3 cups water
  • 1 cup dry white wine
  • 1 teaspoon saffron threads
  • 2 (8-ounce) bottles clam juice
  • Herb Blend:
  • 1 cup chopped fresh parsley
  • 1/3 cup fresh lemon juice
  • 1 tablespoon olive oil
  • 1 teaspoon dried tarragon
  • 2 large garlic cloves, minced
  • Paella:
  • 1 pound monkfish or other firm white fish fillets
  • 16 unpeeled jumbo shrimp (about 1 pound)
  • 1 tablespoon olive oil
  • 2 cups finely chopped onion
  • 1 cup finely chopped red bell pepper
  • 1 cup canned diced tomatoes, undrained
  • 1 teaspoon sweet paprika
  • 1/2 teaspoon crushed red pepper
  • 3 garlic cloves, minced
  • 3 cups uncooked Arborio rice or other short-grain rice
  • 1 cup frozen green peas
  • 16 littleneck clams
  • 1 (7-ounce) jar sliced pimento, drained
  • 2 tablespoons fresh lemon juice

Preparation

  • To prepare broth, combine the first 4 ingredients in a saucepan. Bring to a simmer (do not boil). Keep warm over low heat.
  • To prepare herb blend, combine parsley and next 4 ingredients (parsley through 2 garlic cloves); set aside.
  • To prepare paella, trim connective tissue from monkfish; cut into 1-inch pieces. Peel and devein shrimp, leaving tails intact. Heat 1 tablespoon oil in a large paella pan or large skillet over medium-high heat. Add fish and shrimp; saute 1 minute (the seafood mixture will not be cooked through).
  • Remove seafood mixture from pan, and keep warm. Add onion and bell pepper to pan, and saute 5 minutes. Add the tomatoes, paprika, crushed red pepper, and 3 garlic cloves; cook 5 minutes. Add rice, and cook 1 minute, stirring constantly. Stir in broth, herb blend, and peas. Bring to a low boil, and cook 10 minutes, stirring frequently.
  • Add clams to pan, nestling them into rice mixture. Cook 5 minutes or until shells open; discard any unopened shells. Stir in the seafood mixture, and arrange shrimp, heads down, in rice mixture. Arrange pimento slices spokelike on top of rice mixture; cook 5 minutes. Sprinkle with lemon juice. Remove from heat; cover with a towel and let stand 10 minutes.

Sunday, October 2, 2011

Carrot Coins

Carrot coins? Yawn. Matchsticks? Too much work! Next time you're making a stew or miso soup or gingered carrots, take a few minutes and make carrot flowers. It's simple, not too much extra work and the pay-off is big. Carrot flowers add a sweet, graphic visual to your dish and are an effort that is always appreciated. Step-by-step instructions below the jump.

Saturday, October 1, 2011

Benefits of celery

The various health benefits derived from celery vegetable cooked or raw, or in juice form are
       Celery contains well-balanced basic minerals, vitamins and nutrients.
Vitamin C is recognized for its anti-oxidant properties. Celery, rich in Vitamin C has the ability to protect many types of cancer, supports immune systems and fights cold symptoms.
Flavonoids too have anti-oxidant properties. Celery, rich in flavonoids safely secures against cancer, arteriosclerosis and thrombosis.
As an herb, celery is used to treat different pains.
Research indicates celery contains blood pressure reducing properties mainly because of the high calcium content. For best blood pressure relief, eat celery raw.
Active compounds like Pthalides present in celery relax the muscles of arteries and reduce stress hormones.
Celery helps detoxify body pollutants. Celery neutralizes carcinogens found in cigarette smoke and charcoal grill smoke.
The diuretic effects of celery help treat urinary tract infections, bladder infections and joint inflammations.
High water content celery is beneficial for dieters. The low caloric value of celery is an ideal slimming diet and the high fiber content keeps away the feeling of hunger.
Low in carbohydrate, celery can be included in diets for diabetic patients.
Celery is good for the nerves. Essential oil in celery can provide calm, soothing effect.
Nutrients in celery support healthy skin, eyes and hair.
Celery juice contains anti-arthritic properties.
Celery juice with a tablespoon of honey taken before a meal can suppress appetite improves digestion and boosts immune system.
Celery juice is a natural coolant and protector during humid weather.
Diluted celery juice helps replace valuable fluid and mineral loss due to sweating.
Celery used in plant therapies helps stimulate a normal sexual system.
Few drops of celery tea drops on the eyelid provide ophthalmologic affections.

Friday, September 30, 2011

Pizzas And Pastas, Two Popular Dishes In Italy

Italian cuisine is globe well-known. Pizzas and pastas are the two popular dishes individuals close to the planet are familiar with. Italian recipes are acknowledged for it’s use of fine ingredients these kinds of as herbs and spices. the heritage of Italian cuisine dates back to old Roman days. the historians think the heritage of Italian meals began throughout the eight century BC, when Greek settlers colonized Sicily and Magna Graecia, a area in Southern Italy.

Italian foods of mountainous regions is really a blend of French cuisine and mountain specialties. the Italian cuisine of this area has strong Gallic flavors adopted from France. Hence, a dish this sort of as white truffles or “trifola d’Alba” is 1 with the well-known Italian dish. Seafood having a touch French flavor is discovered in Liguria, a city in North Italy.
The Italians think the nourishing and tasty Italian cuisine was borrowed from your Greeks. the typical dishes consisted of foodstuff ready from chickpeas, lupins, dry figs, pickled olives, salted and dry fish and pork. on occasions this kind of as weddings or festivals a variety of delicacies have been ready. A number of dishes belonging to Magna Graecia consist of sweet meats produced from almonds and walnuts, honey sauces, soups and meat in vinegar. Sumptuous feasts ended up linked with old Roman nobles.

Italian Specialties

Meet Bernadette Donakowski, the owner and operator of this family operated business, which got started back in 1973, making Del's the oldest established Italian restaurant in San Luis Obispo county. Bernie makes sure that her patrons get generous portions when they dine here, and says that "Our lasagna is our specialty." It has ground beef, lots of garlic, mushrooms, onions and three different cheeses, plus our own special meat sauce. Other Italian specialties include New York style pizza, Calzone, Pesto Ravioli, Fettuccine Alfredo and Chicken Parmigiano, just to name a few.

But Bernie does more than supervise the cooking. On any given evening, Bernie can usually be found in the restaurant talking to customers and making sure their visit is a pleasant one. "I really like dealing with people," she states emphatically. Bernie and her two sons work around the clock to ensure the continued success and reputation of their award winning restaurant. Del's has received local and national recognition as a standout Italian restaurant and pizzeria throughout the county. In addition, Del's received the Pismo Beach Chamber of Commerce Business of the Year award in 1991.
So, if you are looking for consistent quality, personalized service and reasonable prices, come to Del's Pizzeria and Italian Restaurant. Del's is the perfect place for families, special events or just a good old fashioned meal. We look forward to seeing you soon at our little pizza heaven.

Thursday, September 29, 2011

Natural Way To Taste White Wine

Do you have feelings of inadequacy?
Do you suffer from shyness?
Do you sometimes wish you were more assertive?
If you answered yes to any of these questions, ask your doctor or pharmacist about White Wine.
White Wine is the safe, natural way to feel better and more confident about yourself and your actions. White Wine can help ease you out of your shyness and let you tell the world that you’re ready and willing to do just about anything.
You will notice the benefits of White Wine almost immediately and with a regimen of regular doses you can overcome any obstacles that prevent you from living the life you want to live. Shyness and awkwardness will be a thing of the past and you will discover many talents that you never knew you had. Stop hiding and start living, with White Wine.
White Wine may not be right for everyone. Women who are pregnant should not use White Wine. However, women who wouldn’t mind becoming pregnant are encouraged to try it.
Side effects may include dizziness, nausea, vomiting, incarceration, erotic lustfulness, loss of motor control, loss of clothing, loss of money, delusions of grandeur, headache, dehydration, dry mouth, and a desire to sing Karaoke.

WARNING:
The consumption of White Wine may make you think you are whispering when you are not.
WARNING:
The consumption of White Wine may cause you to tell your friends over and over again that you love them.
WARNING:
The consumption of White Wine may cause you to think you can sing.
WARNING:
The consumption of White Wine may create the illusion that you are tougher, smarter, faster, and better looking than most.
Guests can search the world-class collection of wines by a wide-range of categories, such as region, grape variety, or price; find a wealth of information on each of the restaurant’s wines, such as tasting notes and information on the vineyard, winery, or region; view photos and wine labels, watch videos, locate the winery on an interactive map, order directly from the POS app.
A guest could also take a virtual trip around the globe to visit any number of the long list of boutique wineries featured on Flagstaff House’s POS app, such as the Araujo Estate and 38-acre Eisele vineyard, the small, family-owned, Dalla Valle Vineyards (which produces only 2 estate wines: the Cabernet Sauvignon – Napa Valley and a proprietary red wine called Maya), and the 240-acre Harlan Estate in Oakville – all in California’s Napa Valley, or the Leonitti Cellar in the Walla Walla Valley of Washington.

World-class Collection Of Wines From Flagstaff House Restaurant

Flagstaff House Restaurant in Boulder, Colorado turned 40 this year. To celebrate, the venerable family-owned and operated restaurant put its Wine Spectator Grand Award-winning wine list on an iPad POS app earlier this year and will host an Anniversary Gala on October 16th. Eight of Boulder’s most well-known chefs — Dave Query (Big Red F Restaurants, which includes Jax Fish House, West End Tavern and Zolo Grill), John Platt (Q’s), Eric Skokan (Black Cat bistro), Jim Cohen (The Empire Lounge and Restaurant, and Pizzeria da Lupo), Antonio Laudisio (Laudisio’s Italian Restaurant), Tony Hessel (The Mediterranean), Radek Cerny (L’Atelier), and Lachlan MacKinnon-Patterson (Frasca Food and Wine) – will join Flagstaff House Partner, Chef Mark Monette, to cook dinner for the multi-course, birthday-bash.
The coveted Wine Spectator Grand Award recognizes the world’s greatest wine lists. Flagstaff House, which now presents its 2,500+ labels on an iPad POS app, has earned the award every year since 1983. The restaurant has also received a number of other prestigious awards, including the Forbes 4-Star Award (formerly, the Mobil 4-Star Award), since 1978, the AAA 4-Diamond Award, since 1980, and the Distinguished Restaurants of North America (DiRōNA) award for Achievement of Distinction in Dining, since 1985.
The restaurant’s wine cellar houses “more than 12,000 bottles of wine,” according to Flagstaff House General Manager and Partner, Scott Monette, who says its “one of the most comprehensive wine lists in the country.” The old printed wine list was a bound book – about the size of a novel; searching the list was a daunting task for anyone. Now, the new state-of-the-art POS app makes it easy for guests to navigate the extensive list and helps them discover new wines, without feeling overwhelmed or intimidated.

Guests can search the world-class collection of wines by a wide-range of categories, such as region, grape variety, or price; find a wealth of information on each of the restaurant’s wines, such as tasting notes and information on the vineyard, winery, or region; view photos and wine labels, watch videos, locate the winery on an interactive map, order directly from the POS app.
A guest could also take a virtual trip around the globe to visit any number of the long list of boutique wineries featured on Flagstaff House’s POS app, such as the Araujo Estate and 38-acre Eisele vineyard, the small, family-owned, Dalla Valle Vineyards (which produces only 2 estate wines: the Cabernet Sauvignon – Napa Valley and a proprietary red wine called Maya), and the 240-acre Harlan Estate in Oakville – all in California’s Napa Valley, or the Leonitti Cellar in the Walla Walla Valley of Washington.

Wednesday, September 28, 2011

How To Use Cheese In Cooking

I usually have at least three (3) and as many as five (5)cheeses. Having at least 3 to 5 cheeses allows me to offer an interesting variety without being too extravagant.
I allow about 3 ounces of cheese per guest if we are just tasting or it's an appetizer plate before a meal. If I want these as a main course I allow 6 to 7 ounces per person.
The other thing I like to do is select ones that combine styles, textures and colors (see "pairings" below). I like to offer different looks, tastes, and feels such as one soft-ripened, one hard and probably a blue. And if I am serving more than three, I like to add one or two with different flavor and color.
Occasionally I'll have a theme tray, such as all blues or all local ones.When I have guests coming I realize some are great cheese lovers and some are "beginners." I try to offer a variety of flavors, with enough mild ones available so everyone can be accommodated. If my tray offered all "stinky" selections, some of my guests would have to stop at a fast food place on the way home.

I usually have a couple kinds of artisan breads or baguettes and interesting crackers, as well as apples, pears, nuts and dried fruit as part of the tray.
I arrange my tray at least an hour or two before my guests arrive. Cheese needs to sit at room temperature for full flavors to be enjoyed. I provide one knife for each selection so flavors don't mingle.
· Serve all soft ripened cheeses in wedges
· Serve fresh soft cheeses like Brie, in the entire form and have a knife to cut and spread it onto crackers or bread
· Semi-soft cheeses should be served pre-cut in the size you desire
· Semi-hard cheeses should be cut into wedges or cubes that expose the cheese to the air
· Hard cheeses should be pre-cut into pieces
· Bleu cheeses should be served in chunks created by your cheese knife
· Arrange cheeses with seasonal fruits cut into bit size pieces (this is also an opportunity to have a few nuts as part of your Fruit and Cheese Tray as well.
· Don't forget your tongs, cheese knives, cheese forks, utensils and/or wooden picks and serving plates and ...don't forget to have a great time!

Lemon Verbena Gimlet Cocktails Recipe

The tartness of lime juice and the herbal freshness of verbena both make this cocktail taste light and refreshing. If the party's outside, pour these over ice to keep them cold, but for a more elegant look indoors, shake with ice in a cocktail shaker and strain into chilled martini glasses.

Ingredients

  • 1 cup water
  • 1/4 cup sugar
  • 1/4 cup torn verbena leaves
  • 3/4 cup dry gin
  • 3/4 cup club soda, chilled
  • 1/4 cup fresh lime juice (about 2 limes)
  • Lemon verbena sprigs (optional)
  • Lime slices (optional)

Preparation

  • 1. Combine 1 cup water and sugar in a small saucepan. Rub torn verbena to bruise; add to pan. Bring sugar mixture to a boil, stirring gently as needed to dissolve sugar evenly; cook 30 seconds. Remove from heat; cool completely. Strain mixture through a sieve over a bowl; discard solids.
  • 2. Combine sugar mixture, gin, soda, and juice. Serve over ice. Garnish with verbena sprigs and lime slices, if desired.

Tuesday, September 27, 2011

Enjoy The Time In The Kitchen

Prepping all your ingredients neatly will keep your kitchen more organized, cut down on cooking time, and allow you to focus on the task at hand. And mise en place photographs make for killer filler photos, as well!
Starting Out

When I first started doing my blog, I had a sony point-and-shoot digital camera, no tripod, and I got on just fine.
The image to the left was taken with a point-and-shoot (PnS) at night, with only my kitchen light on. Even better is taking your photos during the day with natural light. The colors will be much more true to real life, like this photo, which was also taken with a simple consumer camera.
But if you’re looking to improve not only your photos but also your equipment, here are some tips for you.